
With the gardening season at hand (or it will be if it ever stops raining) it's time to transform your patio with some quick, easy and creative ideas.

Today I'm going to show you three different ways to add new life and interest to those old terra cotta pots and containers that have been stored away gathering dust. By just painting, stenciling, white washing, stacking or applying some texture, you can transform your planters and add some pizazz to your outdoor living area.
Show your creativity this spring and spruce up your garden by reinventing your old pots and adding a splash of color with these simple ideas.
First, you need to prepare the pots:
Use a stiff brush or sand paper and rub off all debris. Wash terra cotta pots inside and out. Dry completely-24 hours or more.


Seal the inside of the terra cotta pot with two coats of urethane to keep the painted outside from peeling or bubbling from moisture when you water the plants. Let dry completely before painting or planting.

The shabby chic look:
Try perking up those ol' pots by texturizing the pot and then 'white washing'. So pretty!

Start by preparing pots as mentioned above.
To texturize, you will need a small tube of Dap Dry Dex Spackling for Interior/Exterior (got mine at Home Depot), a frosting decorator's bag or a metal decorator's tube (like I used) fitted with a leaf or scroll tip (or tip of your choice), and newspaper to cover work area.

Squeeze Dap Dry Dex Spackling mixture into your decorator's bag or tube that has been fitted with the desired tip. I used the leaf tip to make leaves on the pot. Use any tip you like to make your favorite design. Though make sure to practice doing a few designs on a piece of newspaper before starting on the pot.

You might even want to sketch your design on the pot, in pencil, before you start. This was my first attempt so I wanted something simple. I put a small dot where I wanted the middle of my leaf to be and just went for it. I was going for a 'shabby chic' look and didn't mind if things weren't perfect.
The Dry Dex is pink when applied, but dries white. Apply Dry Dex per your design
then let dry completely before white washing.

Now, gussy it up by white washing.
To white wash you will need: Latex paint, an old brush or sponge, newspaper and sand paper. Mix 1 T of latex paint with 1/4 cup of water. Blend until smooth. Dip brush or sponge in paint mixture. Wipe off on newspaper until almost no paint remains.

Brush or sponge white wash onto the pot. Brush all around the pot until you arrive at your
desired look. Let dry. Using sand paper, buff areas around the pot to give it a more used weathered look. Seal outside of the pot with urethane, if desired. I chose not to seal my pot as I wanted a very shabby look. Lovely!
Pyramid Pots:

To stack or pyramid your pots, gather everything together to see what sizes and shapes you have to work with. You're going to stack your planters, largest to smallest so try different arrangements until you find one that is appealing to you and will be secure when stacked. It won't matter if your using terra cotta or plastic containers, as long as the container used for the middle tier is not larger, wider, or heavier than the one on the bottom level. Use no more than 3 tiers for stability.

Pack the soil higher in the center around the middle pot to help stabilize the next level.

When you have arrived at the perfect arrangement, start planting colorful annuals in the bottom container. On the middle level, add a few vining plants that will drape down as they grow, to add whimsy. Then continue planting the annuals you have chosen in the top tier. This look adds great color and height to your patio. And works really well in small spaces where planting upwards the only way you can go.
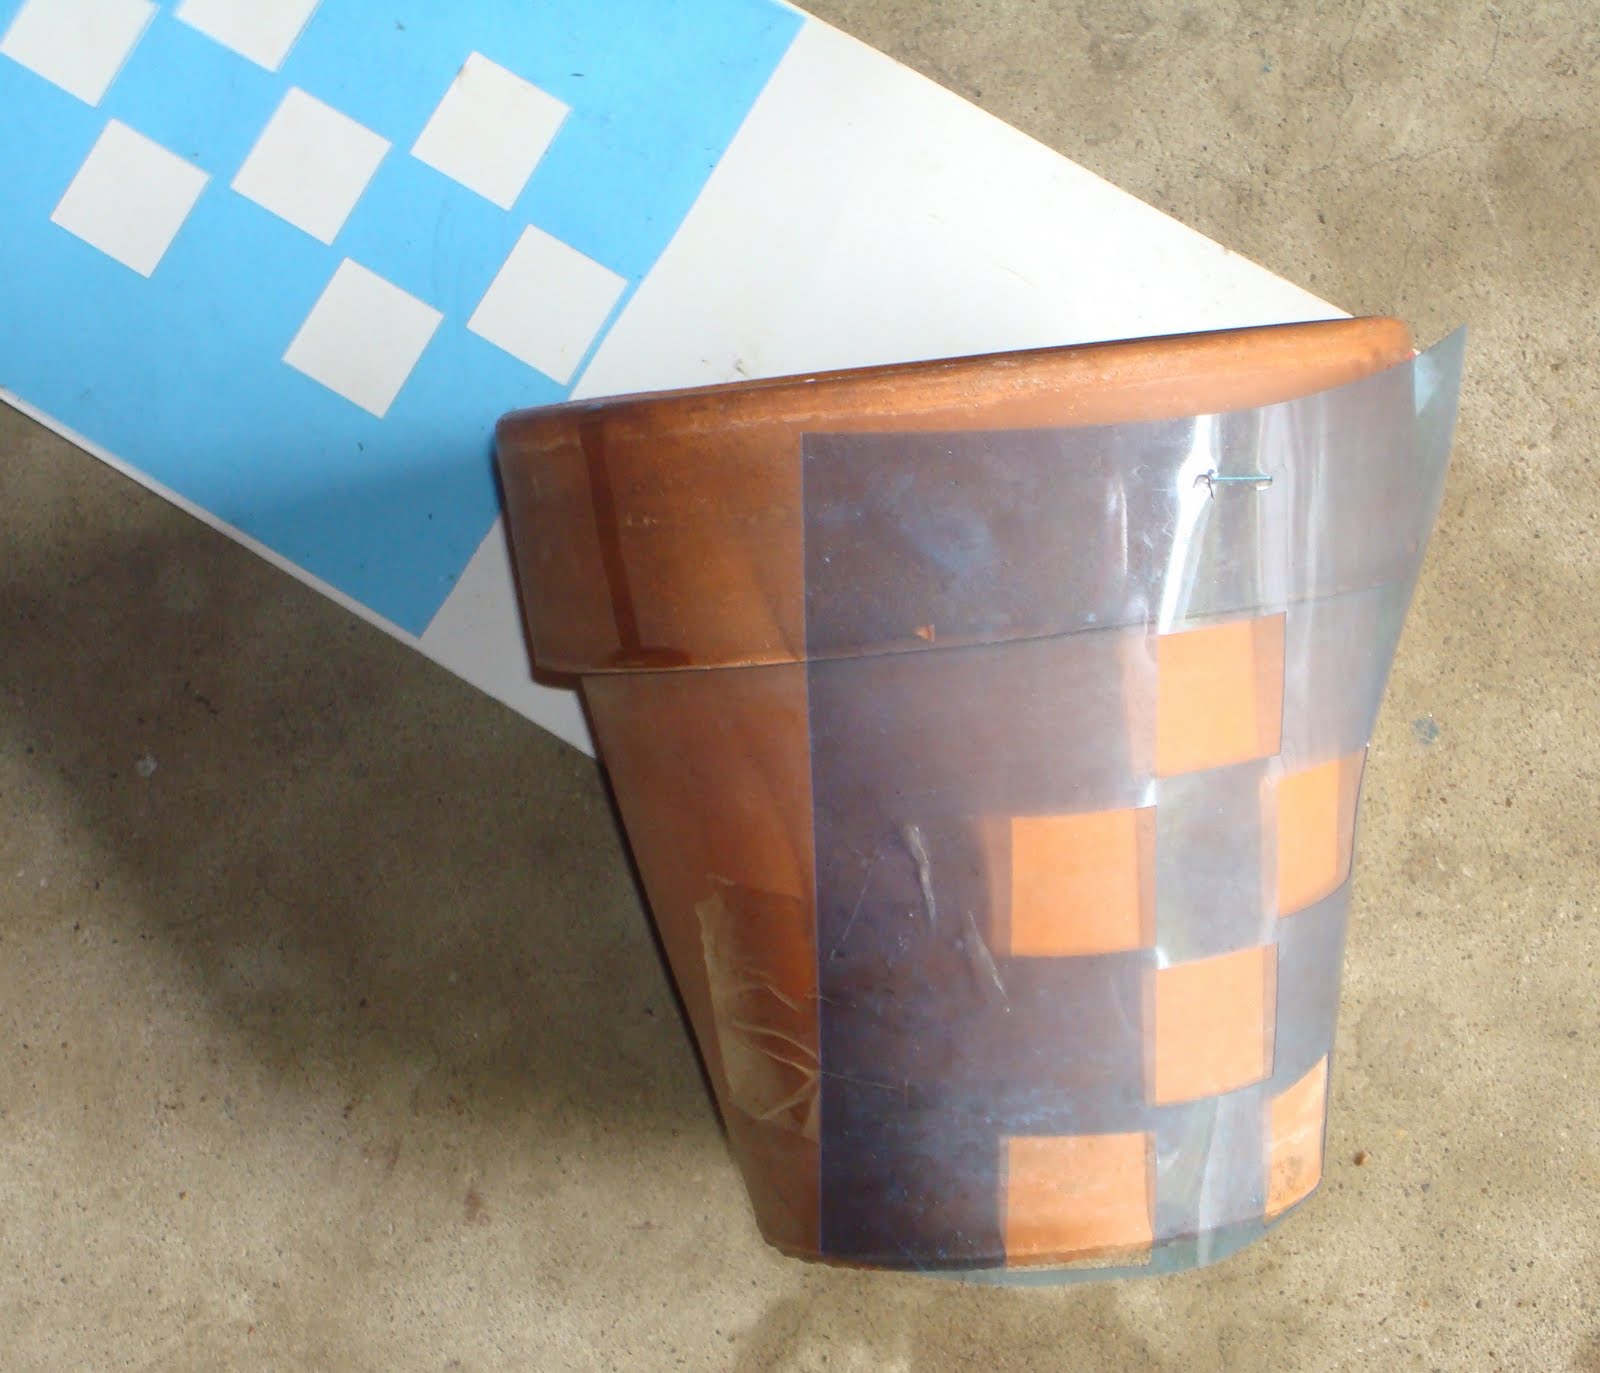
Polished terra cotta pot:

Lastly, you can jazz up a terra cotta pot with the help of a simple square stencil and a touch of shoe polish. This technique was the fastest, easiest, and least expensive.
To do this project you will need: a stencil, a clean terra cotta pot, masking tape, paste shoe polish in cordovan, black, or brown, clear urethane spray and a small sponge or cloth to apply the polish.
Clean and prepare terra cotta pot as described above. Arrange your stencil pattern around the pot or container and secure with tape.
With a cloth or sponge, apply a coat of polish in the stenciled area. Carefully work your way around the pot, moving the stencil as you go. Allow to dry completely. If desired, spray with a urethane spray.

These techniques will really add beauty to your patio. And they won't break the bank! Happy planting!
Mimi


U guys r so creative! Love that!
ReplyDeleteWhat a great tutorial - I had no idea that sealing the inside of the pot would keep the paint from bubbling and peeling. Thanks so much for sharing that tip!
ReplyDeleteSuper cute! I totally need to pretty up my patio.
ReplyDeleteMimi & Cares! I made a little 'Squeee!' sound when I saw this tutorial! (Rather inappropriate for a woman of 53, but, never mind, I'm seldom appropriate!)
ReplyDeleteThis will be perfect for what I have planned for the outside of my house. I've been hemming and hawing over painting my terracotta, it needs to be a certain colour to match other elements and I wanted to do stencils. I'm so glad I waited because I didn't know about painting the inside with clear urethane, now I do!
Thanks so much for posting, now I can get stuck in! :D
Hugs and quiches from Kitty