Home     About Us     Chew on This     Who Knew?     Pied Piper     Thoughts
Showing posts with label Who knew? How to.... Show all posts

Thursday, June 25, 2015

Who knew? How to...Celebrate Leon Day

We're celebrating Leon Day today. 
Happy Leon Day!


If you don't know what Leon Day is, no worries. Until a handful of days ago, I didn't know what it was either. You see, Leon Day is celebrated today, June 25th, and is the midway point until...Christmas. Yep, that's right, I said it - Christmas!

I know Christmas may be the furthest thing from your mind right now - we're in the midst of summer, for goodness sake. We're all popsicles, the sound of lawnmowers, and fire flies. However, Leon Day (Noel spelled backwards - clever, right?) gives us the opportunity to enjoy a little Christmas magic outside of a wonderful, but often times very busy, holiday season. To celebrate this lovely day, maybe you and the kids bake some Christmas cutout cookies for a friend as a nice surprise. Or you could write out your Christmas list and start making or shopping for the gifts now so that last minute spending doesn't blow the budget. Maybe you do what we decided to do to celebrate, make some eatable ornaments for our bird friends that fly south for the winter. 


I love preparing our house for the holiday season, our two large Christmas trees, one in the foyer and one in our family room, being my favorite things to decorate. We fill those trees to bursting with treasured ornaments made or purchased by ourselves or loved ones (these Christmas Ornaments from Patience Brewster are especially whimsical). So we thought, why not gussy up a tree outside to top off Leon Day. Here's what we did; we took some many-days-old bagels, slathered them with peanut butter, and sprinkled with a heavy dose of sunflower seeds. We strung them with bakers twine (as well as some crackers, you know, for variety) and hung everything from a Christmas pine in our yard. Now we can delight in watching the birds feast on our Leon Day ornaments! 


And for the two cuties that thoroughly enjoyed celebrating Leon Day with me, we toasted this new-to-us holiday with Roasted Strawberry Mint Lemonade (don't miss this recipe next Monday!!). Yum!

Happy Leon Day!

Cares


Wednesday, April 10, 2013

Who knew? How to...Homemade All-Purpose Cleaner

Oohhh doggy! Have we got the spring thing going on over here. Big, fat fuzzy buds on the trees are teasing us. The birds are chirping in pleasant chorus. April showers are pattering down. 

And I am hell bent on getting this house of mine crisp and clean. And organized. And thinned out of unnecessary crap stuff.

Do you feel the same way?


Knowing that this need for clean overwhelms me often and would especially hit me once the weather warmed, I started some jars of homemade All-Purpose cleaner before we skipped out of town for spring break. 

It's inexpensive, works great and smells....clean with a slight vinegar finish.

To make this cleaner I use distilled white vinegar, citrus fruit peels and herbs and/or spices and mason jars. For this batch I used some clementine peels and rosemary, clementine peels and cinnamon sticks, and finally just clementine peels alone. You could use lemon, lime, grapefruit or orange peels, if you like, and whatever herb or spice tickles your nose. Or, no additions at all.

Simply place peels and additions into a glass jar about half way up. Cover with vinegar and seal with a tight fitting lid. Shake it up, just a bit, and set in a cool, dark place for two to three weeks.


When you're ready to get cleaning, simply strain your cleaner with a fine mesh sieve into a spray bottle and get to it! (Discard your used peels and additions) 

I have safely used this cleaner on kitchen (granite) counter tops, kitchen cabinets, spot cleaning on the hardwood floor, bathroom counter tops, tubs, sinks, toilets and showers. If you are unsure about any particular surface you might want to clean with this homemade cleaner, try a small spot test to be sure it's right for you.

Hope your spring cleaning is....uhmm....fun and awesome. And quick!

Cares

Thursday, November 15, 2012

Who knew? How to...Homemade Vanilla

I'm going to leap ahead of Thanksgiving for just a moment here. No disrespect to Thanksgiving or anything, I just need to share this Homemade Vanilla with you so, if you choose,  you can get started on your own batch for holiday gift giving. Fun!


So, homemade vanilla, where to start? Well, there are tons of recipes out there for making it and they really don't vary too much. Alcohol, vanilla beans, glass bottles and time. I decided in September that I would be gifting this homemade brew to family and friends for Christmas, so I speedy quick ordered my supplies so I could get started promptly. Supplies arrived and then they sat around for awhile before I finally put it into gear and started my batch. Almost three and a half weeks ago. 

You've got to love some sweet,sweet procrastination. 


Surely you won't get yourself stunted by procrastination, so here's what you can do today to get started...get your supplies.

I purchased my Madagascar Vanilla Beans here. They came very promptly and were super fragrant, inexpensive and wonderful. My four ounce glass bottles were ordered online from SKS Bottle and Packaging. Again, fast delivery and quality product. And when I was finally ready to get this project started, I hoofed it over to my local liquor store and grabbed a big fat bottle of vodka. 

Supplies purchased, let's make vanilla.


The making is simple, open vodka bottle and insert vanilla beans (one bean per four ounces of liquor). My method, however, takes advantage of those glorious, tiny vanilla seeds within each bean. I scraped the majority of those seeds out of the bean and placed them into the vodka to help saturate the vodka with as much flavor possible, instantly. 

So, I carefully split each bean open, starting about 1/2" from the top of the bean and stopping my slice about 1/2" from the bottom of the bean. Then I scraped the seeds out and plopped them into the bottle. Then I placed the whole bean into the bottle.


This bottle contained just a bit over 59 ounces, so 15 beans and their scraped seeds went in. 

Put that cap back on, shake that bottle up and put that baby in a cool, dark place for some weeks (like 5-8 weeks, or more). You should also shake the bottle every day or two to help the process along. You'll be amazed how quickly your vodka changes. The bottles below are just three weeks along and they're already beginning to look rich and lovely.

After three weeks, I decided to fill my (sterilized) bottles. How cute are these? I used a small funnel to help with the pouring. I placed a bit of cheesecloth layered inside the funnel to catch any bits and pieces of the beans that may have broken off during the daily shaking while still allowing many of those small vanilla seeds to pass through. More seeds=more flavor! 

After all the bottles were filled, I removed the beans from the large vodka bottle and placed one in each little bottle. Lids on, labels made and slapped onto each bottle, they were put back into their cool, dark place until gift giving time.


So how does this Homemade Vanilla compare to others? Let's take a look...

The price of other fancy four ounce bottles of vanilla:
Penseys Spices Single Strength Vanilla - $13.99
Williams Sonoma Mexican Pure Vanilla - $12.95
Sur la Table Pure Madagascar Vanilla - $9.50
Simply Organic Pure Vanilla Extract - $16.47

The price breakdown for 15 four ounces bottles (including any shipping cost) of the best Homemade Vanilla:
1.75L + 2 ounces Vodka - $29.00 or $1.93 per four ounce bottle
15 Madagascar Vanilla Beans (32 beans came in my package) - $ .50 per bean
15 four ounces glass bottles and lids (24 bottles/lids came in my order) - $1.51 per bottle

Our total cost per bottle: $3.94!!!!  


Are you ready to get your own batch started? Get going, get going! And enjoy!

Cares

What you'll need:

Homemade Vanilla
(recipe makes approximately 15 four ounces bottles, 
our ratio - 4 ounces of vodka:1 vanilla bean)

1.75 L + 2 ounces of Vodka
15 vanilla beans (I used Madagascar vanilla beans)
15 four ounces sterilized glass bottles with air tight lids

To start, carefully split each of your beans open, starting about 1/2" from the top of the bean and stopping the slice about 1/2" from the bottom of the bean. Scrape the seeds out and place them into the bottle of vodka. Next, place the whole bean into the bottle. After you've scraped all the beans, cap your bottle and shake to distribute the seeds and beans.

Place your bottle in a cool, dark place for 5-8 weeks, or longer. The longer you can steep your beans, the stronger the vanilla flavor. When you're ready, funnel your vanilla into sterilized individual bottles. Place a piece of folded cheesecloth into the funnel, before pouring, to catch any small pieces of bean that could have torn free from the bean during steeping and daily shaking. Place one vanilla bean into each individual bottle. Cap, label and give an amazing homemade gift to family and friends.

Friday, September 28, 2012

Who knew? How to...Homemade 'Vapor' Shower Disks


Fall is all up on us. Cool breezes, bright blue skies with puffy, alabaster clouds. Crimson, yellow, orange and green leaves intermingling purposefully on the trees. Cozy pajamas and fuzzy socks.


Runny noses. Swollen allergy eyes and stuffy sinuses. All the things Fall is made of. 

So much goodness comes during this time of year. Yet, the yucky, snuffly, sniveling stuff can stand in the way of a more joyous Fall. 


I have a little something that may give you some relief. 'Vapor' Shower Disks! I found this amazing recipe on Pinterest and could not get my hands on the ingredients fast enough. Do you know what they are? Well, they're like Vicks® VapoRub®  in disk form for your shower. Vicks® used to sell shower disks but they are impossible to find now. So, a very clever lady over at Frugal by Choice, Cheap by Necessity created her own. Heaven!


Cares

Here's the recipe:

Homemade 'Vapor' Shower Disks
2 1/4 C baking soda
3/4 C water
15 drops (each) lavender, eucalyptus and rosemary essential oil
24 count mini muffin tin
24 mini muffin paper liners

In a large bowl, combine your baking soda and water. Stir thoroughly to combine (the consistency will be a soupy paste). Add your essential oils, 15 drops of each, into your paste mixture and stir. 

Spoon your mixture into your lined muffin tin and allow the disks to dry 24 hours. To use, remove the liner from the disk and place disk on the shower floor and into the water stream of a warm shower. Shower as normal and breath in the wonderful vapors from the disk that should help to clear your stuffy nose and sinuses.

Monday, May 28, 2012

Who knew? How to.... Racing Party

Did you get car racing out of your system this weekend? What with the Indianapolis 500 and the Cocoa Cola 600 taking place, you really should have gotten your fill. Right?
What? You're not into racing? Yeah, I know. I wasn't either until I had a little 
boy that became fanatical about it over the last four years. That means I have become 
knowledgable about racing in ways that I never imagined. 


Yes, that little stinker right there has convinced us all that knowing who Jimmie Johnson,
Kasey Kahne and Greg Biffle are, is very important. I don't doubt him. He is wise 
beyond his years. And speaking of years, this little boy will soon be turning a big 7 years old. 
Ugh! Time flies faster then a race car. 


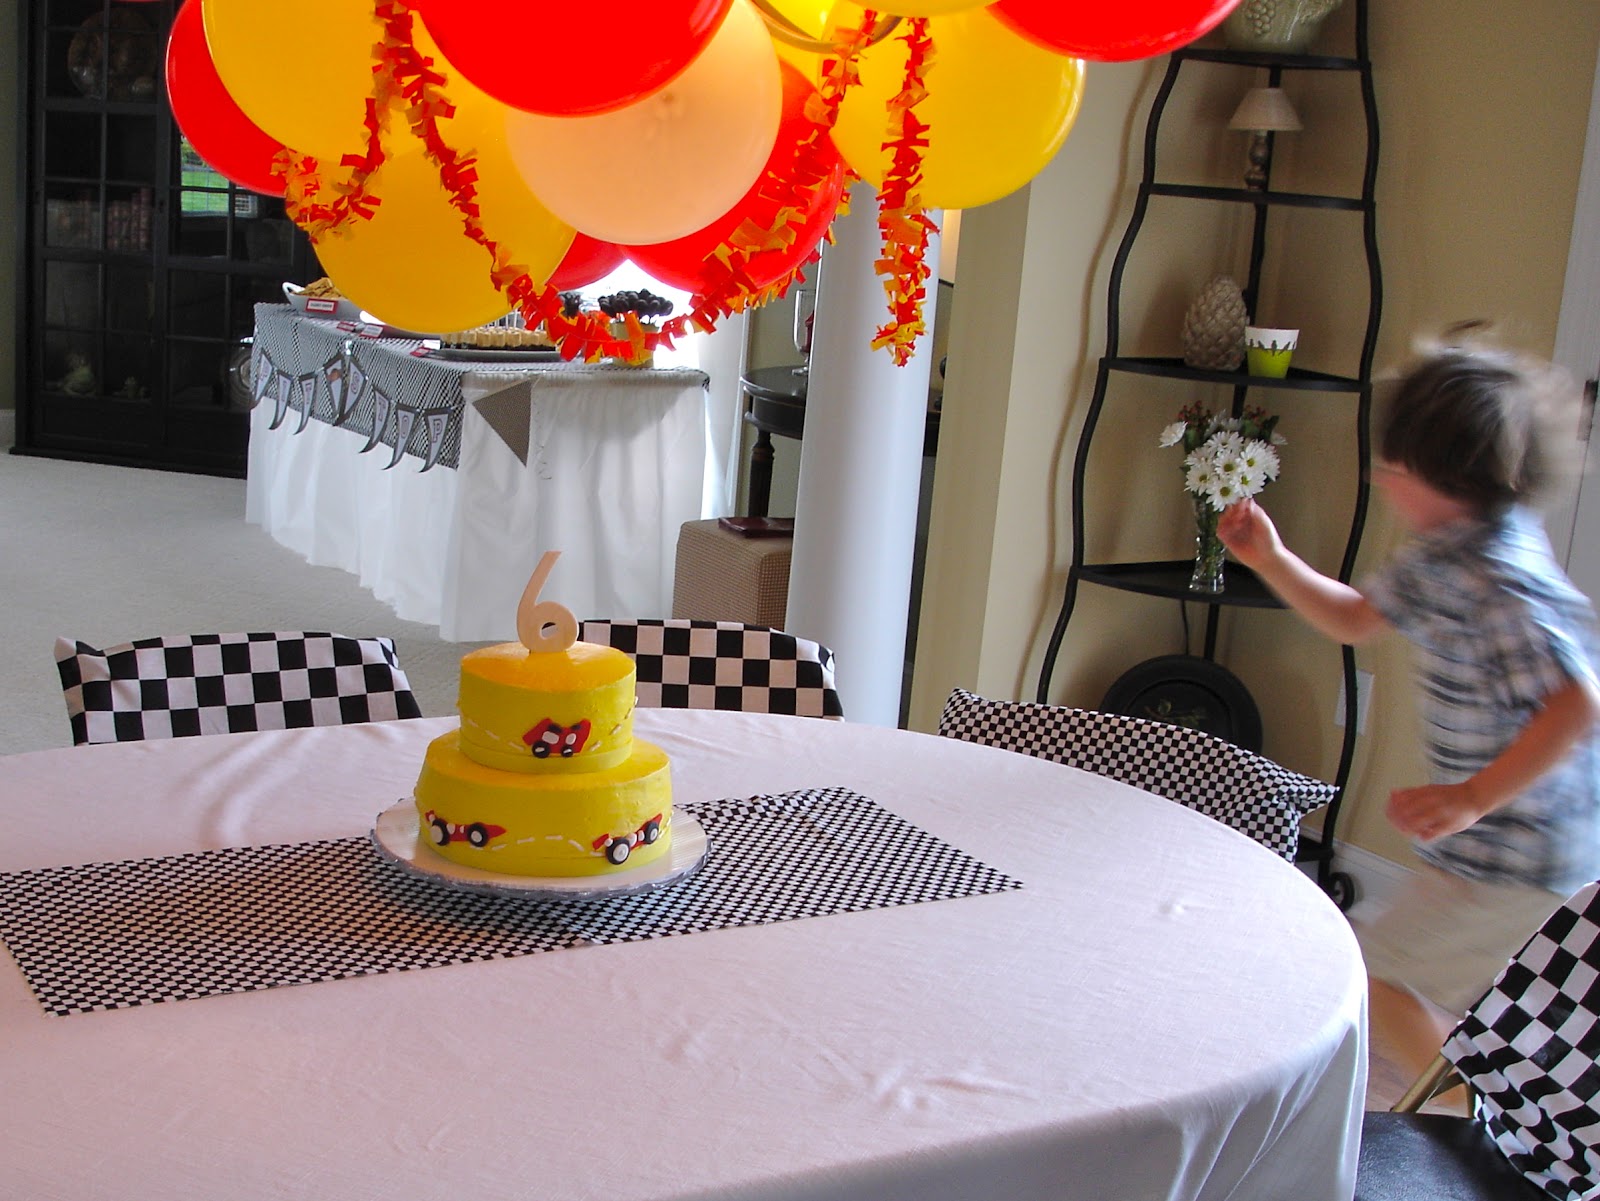
When The Boy turned six last year he had his first friend party. Can you guess the theme of this soiree?  A Racing Party! Yippee! 


We had a Pit Stop filled with food, treats and drinks fit for racing Kings and Queens.


Stop Light Skewers - fruit skewers with strawberries, pineapple and green grapes
Spare Tires - Oreos
Windshield Wipers - Twizzlers
Paint Chips - whole grain Sun Chips


Burnt Rubber - black licorice nuggets
Pit Crew - gummy bears
Spare Tires - mini chocolate covered donuts on a stick
Oil sticks - Rice Krispie treats dipped in chocolate on a stick


A happy little boy racing around the house before his guests arrive.


Denny Hamlin Dogs - my homemade corn dogs
Martinsville Meatball Sliders - my homemade meatball sliders (recipe to come)


A simply lovely cake made by my dear friend (thanks B - you rock!!!!).
 I just showed her a picture of a cake I found on Pinterest and she was able 
to duplicate it perfectly. Now that's talent! Oh, it was so scrumptious!


So, you can see where I focused - on the food. But I didn't just feed our guests, we had 
games, games, relays and more games. It was sooooo fun and The Boy was over the moon gleeful. Pleased as punch. Happy as a clam. 

He really loved his party.

If you're thinking about having a racing party maybe you could use some of these ideas.
It's totally fun for kids. But don't be fooled, it's a blast for adults too! Enjoy!

Monday, May 21, 2012

Who knew? How to... Strawberry Raspberry Mint Shrub

A shrub? A plant? No, a drinking shrub. A drinking vinegar that lends itself beautifully to enhance sparkling water, lemonade, rum or champagne. I had never heard of a shrub (the drinking kind, duh) until just a few months ago. I was instantly curious and smitten. And then I completely forgot about shrubs, drinking and otherwise, and got on something else. 


Thankfully, my latest Organic Gardening magazine arrived to slap me back into my dreamy state of wonder concerning shrubs. In a really lovely piece about Gustavus Inn in Glacier Bay National Park in Alaska (now on the bucket list), there was a recipe for Raspberry Shrub. 

Jackpot! 


Obsession over shrubs became commonplace and I searched far and wide (okay, just internet searching) for the right combination of flavors and the precise way to make a shrub. Let me tell you, there is no 'precise' way to make a shrub. The main ingredients don't really change - fruit, vinegar, sugar - but the process in which to make a shrub can be done in a variety of ways. 

I took an easy, more relaxed path. A longer path. And the results were splendid!


Shrubs last and last when refrigerated. Make a few varieties now and they'll last through the summer cocktail parties and lemonade stands.


Cares
Here's our recipe:
Strawberry Raspberry Mint Shrub
2 C organic strawberries, hulled and quartered
1 C organic raspberries
2 C sugar
1 3/4 C organic apple cider vinegar
1/4 C roughly chopped mint leaves

To start, place your prepared strawberries and raspberries in a large, nonreactive bowl (I used a glass bowl). Gently press on the fruit with a spoon until every piece is a bit muddled. Add the sugar and stir to coat thoroughly. Cover your bowl tightly and set in a cool, dark spot to macerate for 1 to 2 days.

After 1 to 2 days, add your vinegar and mint and stir to combine. Again, cover the bowl tightly and allow the mixture to meld together for about 7-10 days. The flavor with be intense and tangy within the first few days, by days 7-10, things have mellowed and the flavor should be just right.

Strain your liquid/fruit mixture through a fine mesh sieve lined with cheesecloth, pressing on the fruit to extract as much juice as possible. Discard your fruit and mint. Pour shrub into a clean bottle or jar with a tight fitting lid. Store in the refrigerator. 

Consider this shrub your drink enhancer. Add it to sparkling water, seltzer water or lemonade. Kick up your cocktails by adding to champagne, gin, tequila or vodka containing drinks. Enjoy!

Wednesday, April 25, 2012

Who Knew? How To...Vegetable Garden Treats

We're preparing our raised garden beds for planting. We're pulling weeds, adding compost and straw. Priming the soil for seeds and seedlings to come. So excited! We had our first, small garden last year and it exceeded our expectations. Tomatoes, bell peppers, jalapeños, green beans, broccoli and zucchini. Home grown goodness.


The kids took a shine to the garden last year and are showing great enthusiasm for the harvest to come this summer. I've asked them what they would like to grow this year and now potatoes and carrots have been added to an ever growing list. Fun!

To keep their garden interest from waning during this last week of cold and rain (and to use up some left over Easter candy), I decided to make them some sweet, miniature raised garden beds. Squeals all around!


Here's what you'll need:
Oreo cookies, chocolate frosting, vanilla wafer cookies, orange jelly beans and green fruit leather or Sour Punch candy

First, prepare your soil. Crush about 10 Oreos with a rolling pin into fine crumbs.


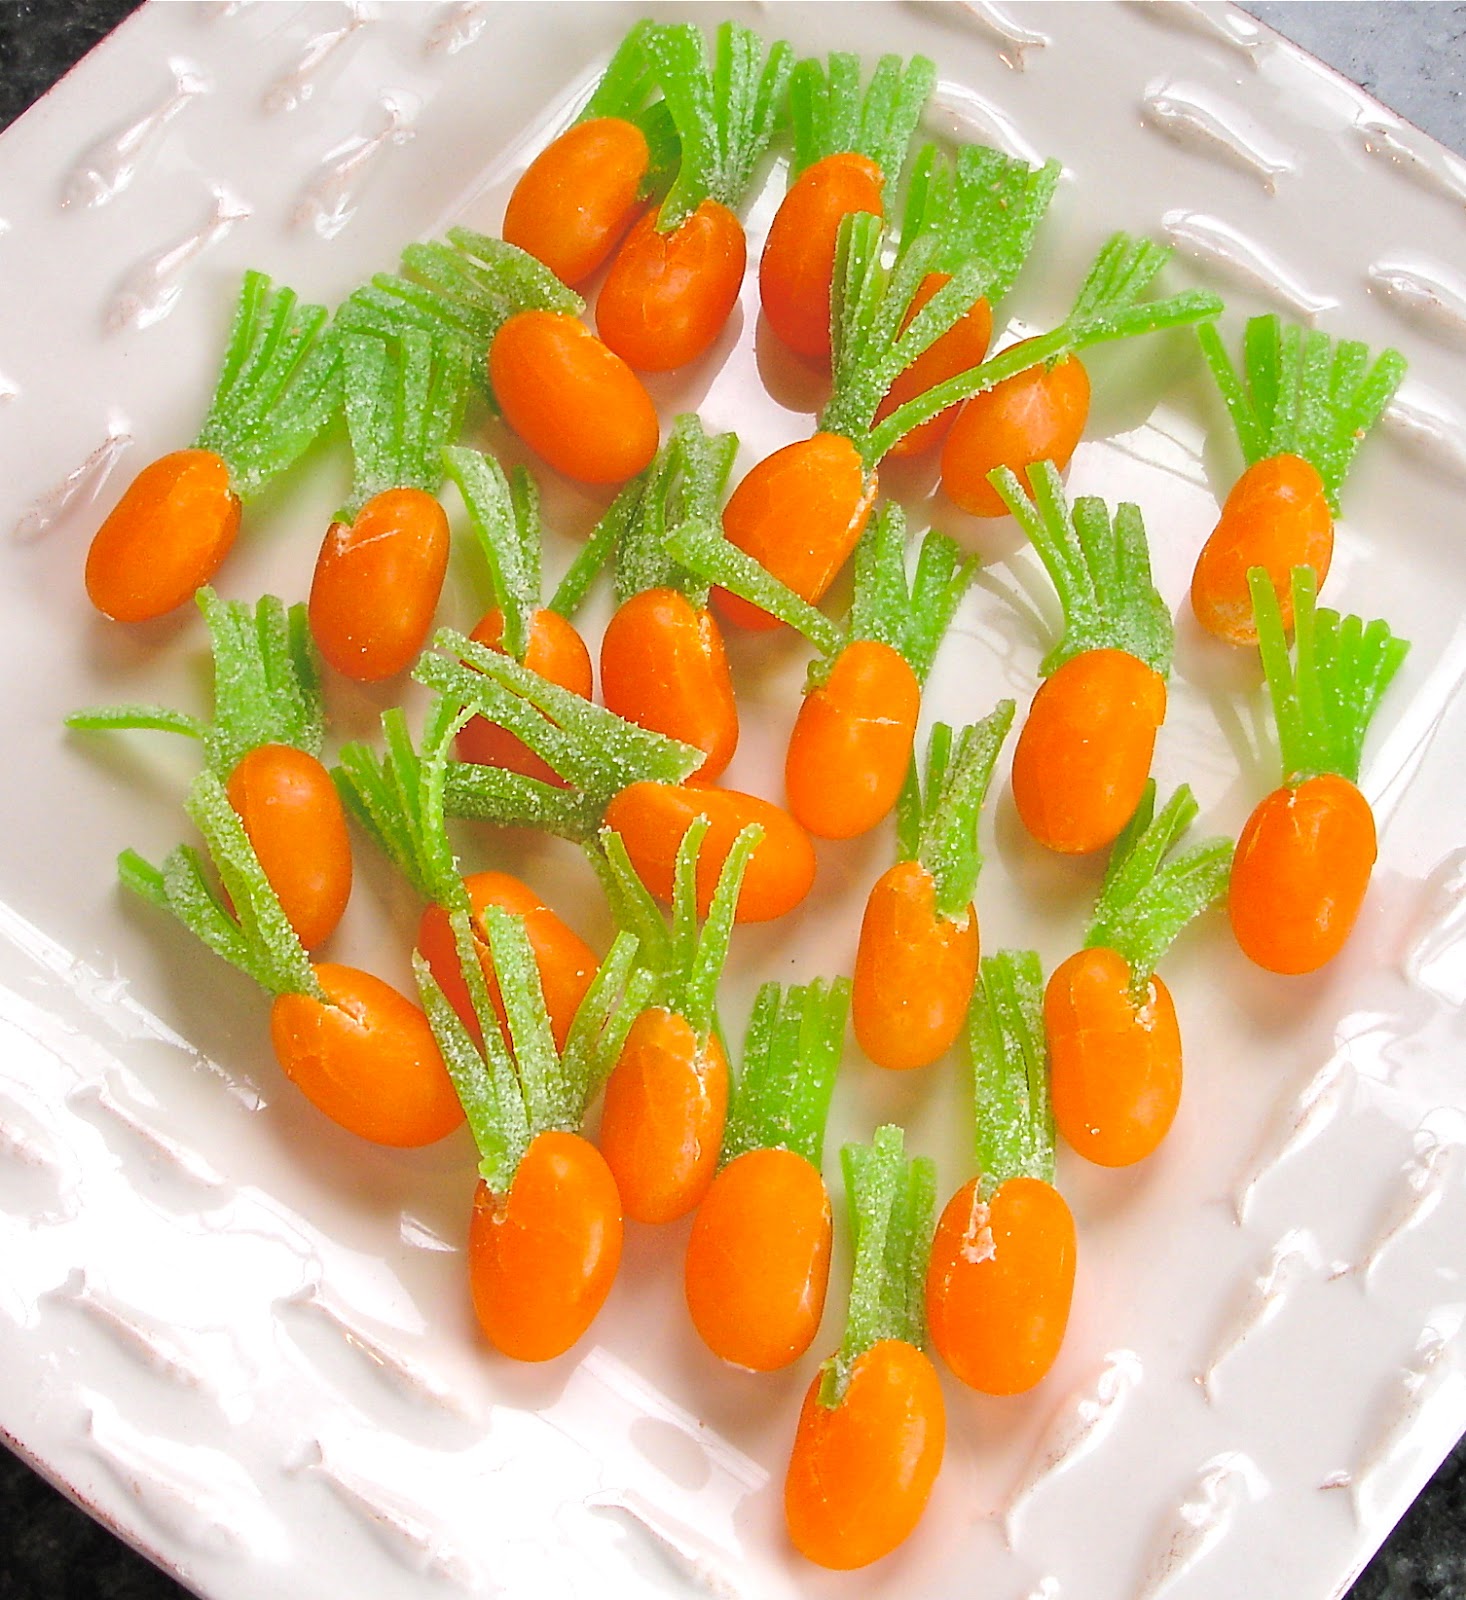
Next, carrots. Slice a slit at the top of the jelly bean. Be very careful doing this, I nearly sliced my finger. Squeeze the bean to open the slice wider so you can insert the green 'fronds'.  For the carrot fronds I used Sour Punch candies. They're little tubes that I cut in half and then I cut tiny strips to create the fronds.


Check these out. A bushel of candy carrots! YUM!


Now we've got to plant these little cuties in a hip raised garden bed. These veggie beds are formed by icing some vanilla wafers together. 

A bottom. Two long sides. And two short sides.


Fill your veggie bed with your Oreo soil and then plant your carrots. I don't think anyone, young or old, could resist these veggies! Enjoy!


Cares

Monday, March 19, 2012

Who Knew? How To...Homemade Goat Cheese


"On the table, under a wooden bowl to protect it from hungry rats and cats alike, sits a 
perfect goat cheese wrapped in basil leaves. Prim's gift to me on reaping day. 
I put the cheese carefully in my pocket as I slip outside"
 ~Katniss Everdeen, The Hunger Games


My sister is a most amazing source for good reads. Excellent reads.  

Because we are a family of avid readers, we long for those books that will imprint themselves onto our psyche. My sister is very adept at finding these gems and happily passing them along to all of us. The Hunger Games was shared way back when and I have since shared the gift of this book with many. 


In honor of the movie release on Friday, I have made some of Prim's goat cheese. It is smooth, tangy and incredibly good. 

Happy Hunger Games. May the odds be ever in your favor.

Cares

Here's the recipe:

Homemade Goat Cheese
(recipe adapted from kiss my spatula)

1 quart goat milk (don't use ultra pasteurized)
1/4 C fresh lemon juice
salt
fresh basil
lemon zest
candy thermometer
cheese cloth
fine mesh colander

Start by lining your colander with about four layers of cheesecloth. Set your colander over a large bowl to catch the whey that will drain of the goat curd you're about to create. 

Next, pour your goat milk into a medium sauce pan. Heat milk over medium-low heat until the candy thermometer reaches 180℉. Remove sauce pan from the heat and pour in your lemon juice. Stir gently to incorporate the juice and then allow mixture to sit for about 30 seconds while the curds begin to form.

Carefully pour your mixture into the lined colander. Pull the four corners of your cheesecloth together and tie around the handle of a spatula or wooden spoon. Hang the bundle over your bowl to catch addition whey (I hung mine through the door handles of my kitchen cupboards). Allow the goat cheese to drip and dry for approximately 1 hour. 

When ready, place your goat cheese in a bowl to add your seasonings - salt, chopped basil and lemon zest (to your taste). Spoon and smooth your seasoned goat cheese into a 4" ramekin, cover and refrigerate. Spread goat cheese onto a nice crusty hunk of french bread and enjoy!

Tuesday, June 14, 2011

Who Knew? How To...Man Wash


Remember Soap-on-a-Rope? I gave my Dad Soap-on-a-Rope as a Father's Day gift every year from age five to probably about age ten or twelve. What could be more useful in the shower than soap attached to a rope? No bending, no slippery soap escaping from one's grasp - genius. And my thinking was that my Dad could loop that rope around his neck and let the suds start flying from about his rib cage on up. The spray from the shower, and gravity, could take care of the rest. 

Well, now that the Soap-on-a-Rope trend has been quietly tucked away, I wondered what gesture could I make for my Dad, and husband, to keep them fresh as daisies. I searched and found a basic liquid soap recipe that I could get clever with and make manly

Here's what you'll need:
Liquid castile soap (mine was accented with peppermint and was found at a health food store), honey, rosemary essential oil, peppermint essential oil, distilled or filtered water and containers to fill.


In a glass bowl, combine 8 ounces of your castile soap with 4 ounces of honey. Mix thoroughly. Next, add your essential oils. The quantity is entirely up to you based on your preference and nose. As well as how dirty and stinky your recipient may be. I added 4 drops of peppermint oil and 10 drops of rosemary oil. Finally, add 2 ounce of distilled or filtered water. Stir and pour into your containers.


The liquid castile soap is very sudsy and cleans well. The honey is naturally antibacterial and makes the skin feel soft and moisturized. Peppermint oil wakes up the skin making it feel tingly and cool. And the rosemary oil brightens dull skin and adds a woody scent to the mix.

I think most any gentleman would enjoy being gifted such a lovely, thoughtful homemade gift. Especially since there's no rope involved. Happy scrubbing!

Cares

Tuesday, June 7, 2011

Who Knew? How To..Renew your outdoor rugs

Do you have any outdoor rugs on your deck or patio? They're lovely aren't they? Well, until the summer sun fades them, or they get a run and unravel, or they mold during the summer (or winter, if not stored properly), or they wear down to yucky, nubby ugliness. Well, even with all of that, I do love outdoor rugs. They cozy up our outdoor spaces and turn them into outdoor living rooms.


But, purchasing new rugs every year is hardly budget friendly. I know, I've done it a couple of times and feel guilty about it each time. So, this year I decided to spruce up my outdoor rugs and get another year, or two, of use out of them. 


I bought these rugs at Target last spring (Trudie did not come with the purchase). They replaced some rugs I had purchased from a catalog that had unravelled and faded the prior summer. These Target rugs were nice, soft on our feet, were less expensive than the catalog rugs, and came in a nice red that complemented our chair pads. However, they too faded in the summer sun.


So instead of pitching them, I thought I would try painting them. Why not? I was thinking about biting the bullet and buying new rugs anyway. If I ruined them I would just, sigh, buy new rugs again. And if it worked, I would be crowned the household genius. 

We got some red outdoor paint. I really didn't know what would be best, but hoped this would suffice. 


Our large rug was the easiest, in that I only had to tape off the inner portion of the rug and then paint in a straight line. I painted on two coats, allowing for the first coat to dry before applying the second coat.


After the second coat had dried I used this polyurethane spray to seal the paint.


And here's a look at my finished large rug.


It's so much better! It has been out on the porch for two weeks. In soaking rain and scorching hot sun. 


This rug is still a work in progress. Lots of small detail that I am painting with a very small paint brush. I keep telling myself it will be worth it when it's done. Just look how much better the painted portion is compared to the faded side. Yes, looking at this does keep me motivated.


In the end, I know these rugs will make it through the summer looking fresh and practically new. And hopefully by the end of the summer I'll be able to store them away, again, for next year!

Cares

Tuesday, May 31, 2011

Who Knew? How To...Jazz up Patio Pots & Containers


With the gardening season at hand (or it will be if it ever stops raining) it's time to transform your patio with some quick, easy and creative ideas.  


Today I'm going to show you three different ways to add new life and interest to those old terra cotta pots and containers that have been stored away gathering dust. By just painting, stenciling, white washing, stacking or applying some texture, you can transform your planters and add some pizazz to your outdoor living area. 

Show your creativity this spring and spruce up your garden by reinventing your old pots and adding a splash of color with these simple ideas. 

First, you need to prepare the pots:
Use a stiff brush or sand paper and rub off all debris. Wash terra cotta pots inside and out.  Dry completely-24 hours or more.


Seal the inside of the terra cotta pot with two coats of urethane to keep the painted outside from peeling or bubbling from moisture when you water the plants.  Let dry completely before painting or planting.


The shabby chic look: 
Try perking up those ol' pots by texturizing the pot and then 'white washing'. So pretty!


Start by preparing pots as mentioned above.


To texturize, you will need a small tube of Dap Dry Dex Spackling for Interior/Exterior (got mine at Home Depot), a frosting decorator's bag or a metal decorator's tube (like I used) fitted with a leaf or scroll tip (or tip of your choice), and newspaper to cover work area.


Squeeze Dap Dry Dex Spackling mixture into your decorator's bag or tube that has been fitted with the desired tip. I used the leaf tip to make leaves on the pot. Use any tip you like to make your favorite design. Though make sure to practice doing a few designs on a piece of newspaper before starting on the pot.


You might even want to sketch your design on the pot, in pencil, before you start. This was my first attempt so I wanted something simple.  I put a small dot where I wanted the middle of my leaf to be and just went for it. I was going for a 'shabby chic' look and didn't mind if things weren't perfect.


The Dry Dex is pink when applied, but dries white.  Apply Dry Dex per your design
then let dry completely before white washing.


Now, gussy it up by white washing. 
To white wash you will need: Latex paint, an old brush or sponge, newspaper and sand paper. Mix 1 T of latex paint with 1/4 cup of water.  Blend until smooth. Dip brush or sponge in paint mixture. Wipe off on newspaper until almost no paint remains.


Brush or sponge white wash onto the pot. Brush all around the pot until you arrive at your
desired look. Let dry. Using sand paper, buff areas around the pot to give it a more used weathered look. Seal outside of the pot with urethane, if desired.  I chose not to seal my pot as I wanted a very shabby look. Lovely!


Pyramid Pots:


To stack or pyramid your pots, gather everything together to see what sizes and shapes you have to work with.  You're going to stack your planters, largest to smallest so try different arrangements until you find one that is appealing to you and will be secure when stacked. It won't matter if your using terra cotta or plastic containers, as long as the container used for  the middle tier is not larger, wider, or heavier than the one on the bottom level. Use no more than 3 tiers for stability.


Pack the soil higher in the center around the middle pot to help stabilize the next level.


When you have arrived at the perfect arrangement, start planting colorful annuals in the bottom container.  On the middle level, add a few vining plants that will drape down as they grow, to add whimsy. Then continue planting the annuals you have chosen in the top tier. This look adds great color and height to your patio. And works really well in small spaces where planting upwards the only way you can go.  


Polished terra cotta pot:


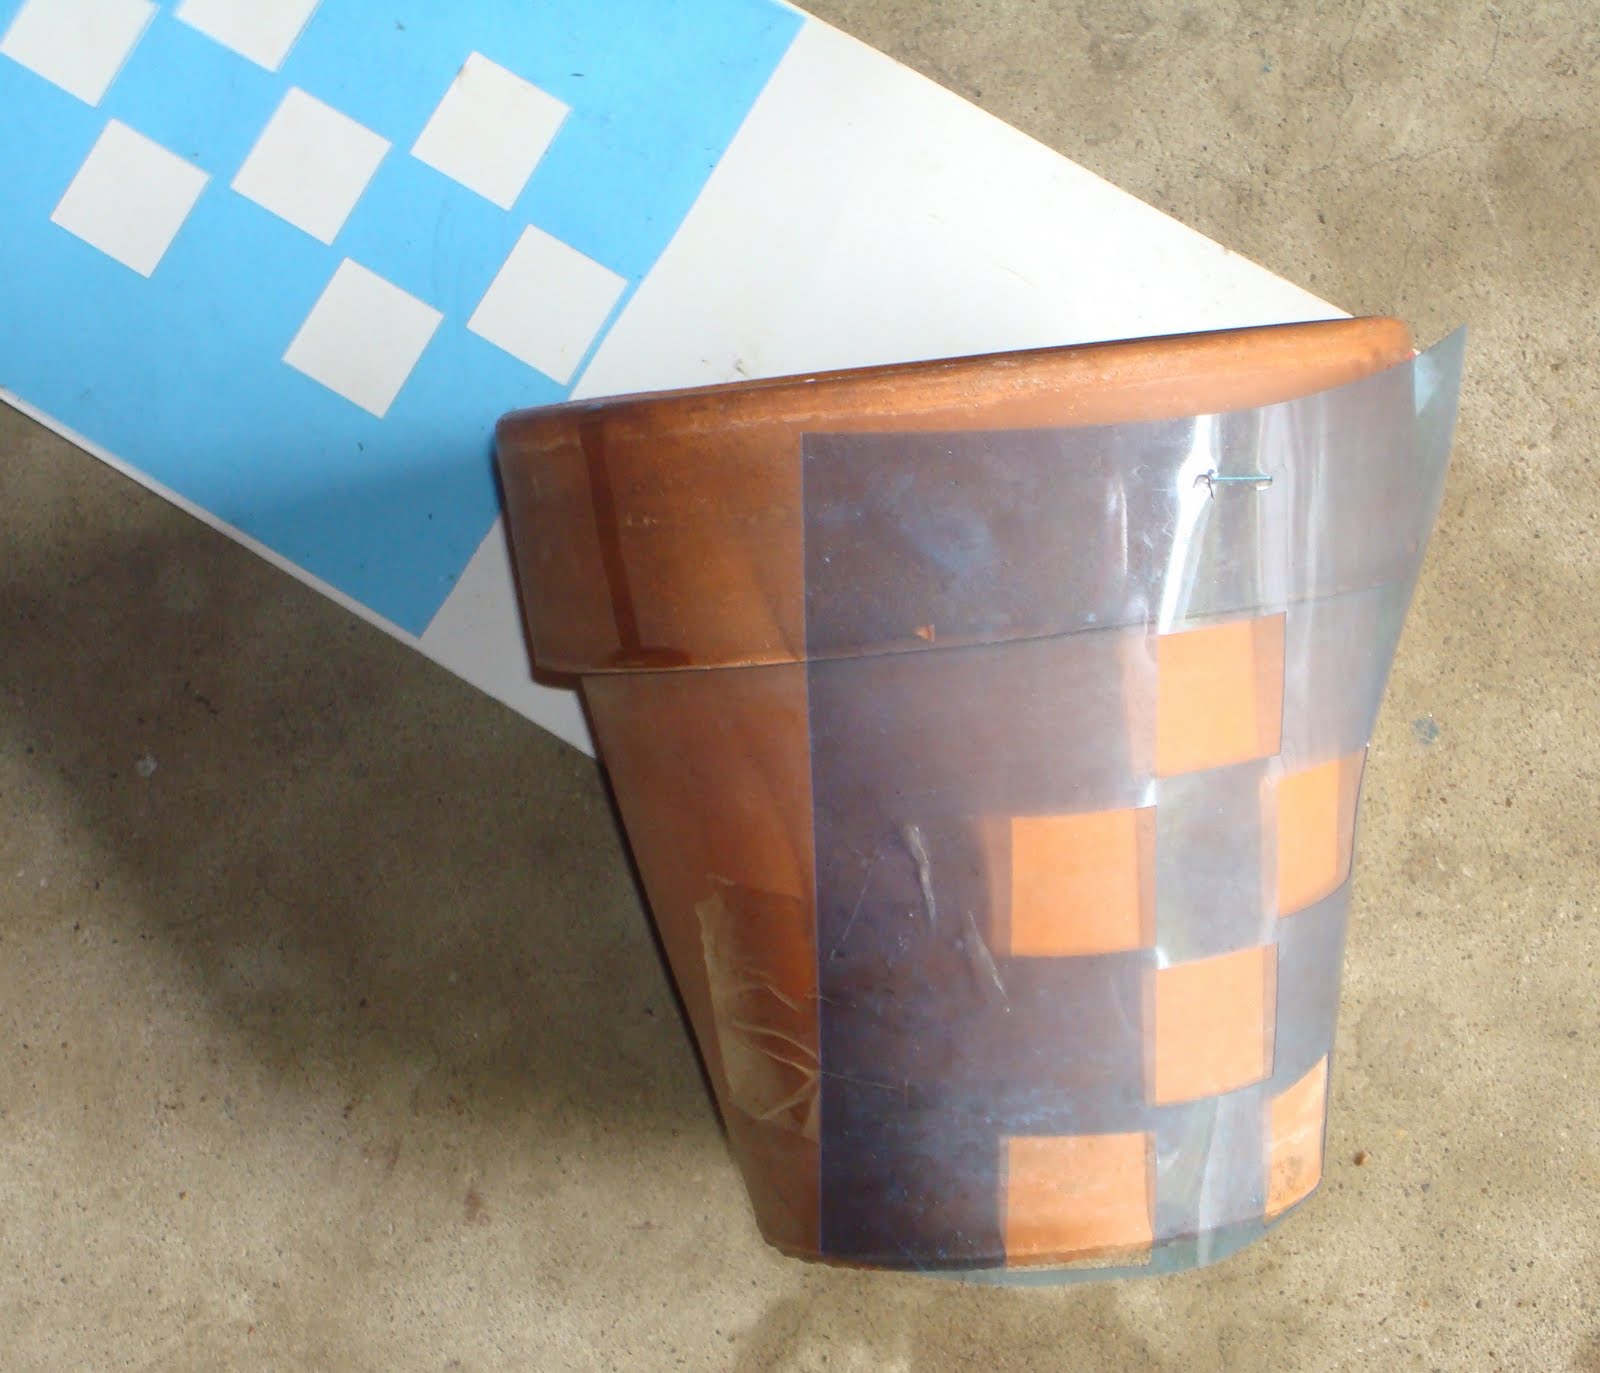
Lastly, you can jazz up a terra cotta pot with the help of a simple square stencil and a touch of shoe polish.  This technique was the fastest, easiest, and least expensive.


To do this project you will need: a stencil, a clean terra cotta pot, masking tape, paste shoe polish in cordovan, black, or brown, clear urethane spray and a small sponge or cloth to apply the polish.


Clean and prepare terra cotta pot as described above. Arrange your stencil pattern around the pot or container and secure with tape.


With a cloth or sponge, apply a coat of polish in the stenciled area. Carefully work your way around the pot, moving the stencil as you go. Allow to dry completely. If desired, spray with a urethane spray.   


These techniques will really add beauty to your patio. And they won't break the bank! Happy planting!

Mimi


We've linked up to...